Showing posts with label ubuntu. Show all posts

Redis: How to Increase File Descriptor Limits

Tags: November 25, 2016 8:06 PM
1 comments

Problem

When you run redis server it complains can not set maximum open files because it has reached the OS max file descriptor limits. Here is the sample output.

$ ./bin/redis-server
28436:C 25 Nov 20:10:03.978 # Warning: no config file specified, using the default config. In order to specify a config file use ./bin/redis-server /path/to/redis.conf
28436:M 25 Nov 20:10:03.979 # You requested maxclients of 10000 requiring at least 10032 max file descriptors.
28436:M 25 Nov 20:10:03.979 # Server can't set maximum open files to 10032 because of OS error: Operation not permitted.
28436:M 25 Nov 20:10:03.979 # Current maximum open files is 4096. maxclients has been reduced to 4064 to compensate for low ulimit. If you need higher maxclients increase 'ulimit -n'.
[...CUT...]

When you try to increase the maximum file descriptor using ulimit as root by issuing sudo it returns an error.

$ sudo ulimit -n 65000
sudo: ulimit: command not found

Wow, WTF is that? ulimit is a shell built so giving sudo an instruction to run a command called ulimit will not work. It will the same as statement below.

Share on Facebook Twitter

How to Fix No Sound After Mute and Unmute on XFCE

Tags: October 7, 2016 7:36 PM
2 comments

Problem

There is no sound after doing mute then unmute on XFCE 4 Ubuntu 14.04.

Solution

Try running amixer command to see the status of the Master sound.

$ amixer get Master
Simple mixer control 'Master',0
  Capabilities: pvolume pswitch pswitch-joined
  Playback channels: Front Left - Front Right
  Limits: Playback 0 - 65536
  Mono:
  Front Left: Playback 65536 [100%] [off]
  Front Right: Playback 65536 [100%] [off]

In above result the status of Front Left and Front Right is [off]. Meaning it is still muted even has been unmuted from the XFCE panel. Try to toggle the switch to make it [on].

Share on Facebook Twitter

How to Create Root Certificate Authority (CA) and Self Signed Certificate

Tags: June 18, 2016 9:47 AM
0 comments

Goal

Make client application such as web browser to trust our self signed certificate, so we can use any custom domain in development or internal network.

Generate Root CA

The first is to generate private key for our Certificate Authority (CA). Command below will generate RSA based private key 2048 bits key size.

$ mkdir self-root-ca && cd self-root-ca
$ openssl genrsa -out myRootCA.key
Generating RSA private key, 2048 bit long modulus
.................+++
................+++
e is 65537 (0x10001)
$ chmod 0600 myRootCA.key

Command above will produce a file called myRootCA.key. The chmod command will make sure that only super user and the creator of the key able to read the file.

Share on Facebook Twitter

Stop Gnome Keyring for Managing ssh-agent on Xubuntu

Tags: June 14, 2016 6:35 PM
0 comments

Goal

Stop Gnome keyring for managing ssh-agent on Ubuntu so you can use the original OpenSSH ssh-agent implementation.

Quick Solution

The solution is quite easy because Gnome Keyring daemon provide a way to replace the existing session.
$ gnome-keyring-daemon --replace --daemonize --components=pkcs11,secrets,gpg
Command above will replace the existing Gnome Keyring daemon but it removes the ability to manage the ssh agent. You can execute command below to make sure Gnome keyring does not manage the ssh agent anymore.

Share on Facebook Twitter

Starting Ngrok Automatically at Boot Using Upstart

Tags: May 19, 2016 6:41 PM
0 comments

Goal

Expose SSH of the local machine to the internet using service provided by ngrok.com.

Steps

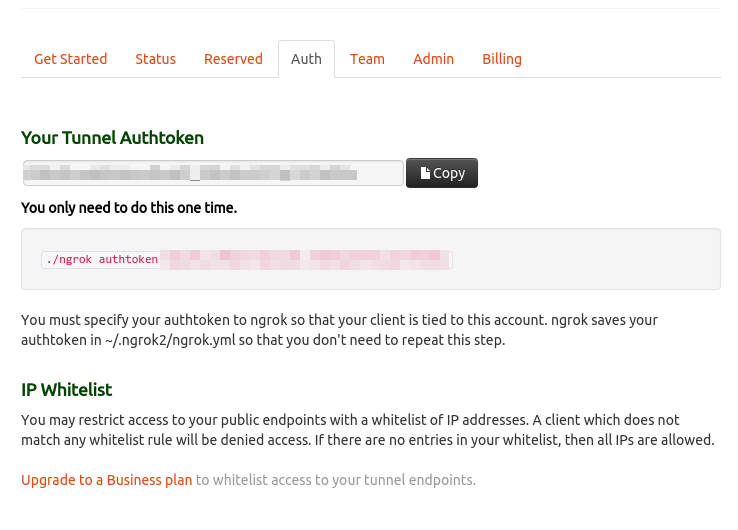
First thing first create an account at ngrok.com so we can get the Auth Token and also can monitor the tunnel created and know the address of the tunnel. Next is create a configurion file under ~/.ngrok2/ngrok.yml to store the token. You can get this token on your Ngrok dashboard.

$ cat > ~/.ngrok2/ngrok.yml
authtoken: YOUR_NGROK_TOKEN
Then create new file called ngrok.conf in /etc/init. Assuming the location of the ngrok binary is on /opt/ngrok/ngrok.

Share on Facebook Twitter

Simplify Multi-Hop SSH Connection Using Config

Tags: April 29, 2016 8:15 PM
0 comments

Goal

Using SSH config to simplify connecting to another host from a host a.k.a multi-hop connection. Diagram for the connection:
+---------------+
| Local Machine |
| 192.168.0.5   |
+---------------+
      |
      | SSH 
       \
       \/
+-------------------------------------+
| Host Machine 192.168.0.10           |
|           /          \              |
|          / -- SSH --  \             |
|  +--------------+  +-------------+  |
|  | Docker 1     |  | Docker 2    |  |
|  | 172.17.0.1   |  | 172.17.0.2  |  |
|  +--------------+  +-------------+  |
|                                     |
+-------------------------------------+

Share on Facebook Twitter

Configure Postfix to Relay to Amazon SES SMTP Server

Tags: April 27, 2016 6:55 AM
0 comments

Goal

Configure internal Postfix installation to relay email to Amazon SES SMTP server.

Steps

Make sure you have done everything that Amazon SES requires you before you're able to send email using Amazon SES. After that you can start to proceed steps below.

1. Install Postfix

$ sudo apt-get install postfix libsasl2-modules

2. Configure SMTP Credential

Make sure you already have Amazon SES username and secret key. Now we need to add the credential into postfix lookup table.
$ sudo cat > /etc/postfix/sasl_passwd
[email-smtp.us-east-1.amazonaws.com]:587 YOUR_USERNAME:YOUR_SECRET_KEY
$ sudo chmod 0600 /etc/postfix/sasl_passwd
You may change the smtp server email-smtp.us-east-1.amazonaws.com according region where you setup the Amazon SES. Now update the postfix lookup table.
$ sudo postmap /etc/postfix/sasl_passwd

Share on Facebook Twitter

Switching USB Modem to Serial Manually

Tags: May 12, 2014 3:56 AM
0 comments

Without having to use usb-modeswitch switching the USB modem can be done easily. In this example I use USB CDMA modem with vendor ID 201e and product ID 1023 (when detected as CD-ROM storage) and product ID 1022 (when detected as USB modem or USB storage).

Requirements

Most of these module are present in all modern linux distro.
  • Kernel module: option (USB Driver for GSM modems)
  • Kernel module: usbserial (USB Serial Driver core)

Step 1: Detach the CD-ROM Storage

When you first plug your USB modem it might detected as CD-ROM storage. To identify the modem you can use dmesg and lsusb commands. Make sure running these commands as root.

Share on Facebook Twitter

Ubuntu TP-Link TL-WN723N Ad-Hoc Network

Tags: May 11, 2014 3:20 PM
0 comments

The Wifi ad-hoc network configuration that will be created for this task are composed from the following devices:

  1. Computer A (TP-Link TL-WN723N) IP: 192.168.1.25/29
  2. Computer B (Other Wireless) IP: 192.168.1.26/29

Step by Step Ad-Hoc Configuration

This is important, the Computer B should be configured first followed by Computer A. It might not work if configured using opposite order. Bug: https://github.com/lwfinger/rtl8188eu/issues/4

Share on Facebook Twitter

Ubuntu Linux TP-Link TL-WN723N Driver

Tags: May 9, 2014 11:18 PM
0 comments

Update

The more recent driver for TP-Link TL-WN723N can be found on https://github.com/lwfinger/rtl8188eu. This new driver address problem for kernel 3.8+. Do not forget to copy the firmware file rtl8188eufw.bin to /lib/firmware/rtlwifi/. Failed to do so, you might can not bring the device up.


I just bought a nano wireless adapter from TP-Link, the TL-WN723N. But my Xubuntu 12.04 did not recognize it, well that sucks. But thanks to this guy he made the driver for it: https://github.com/gleb-chipiga/rtl8188eu.

Driver Installation

Make sure the compiler and git already installed on the system.
$ mkdir -p /tmp/tp-link && cd /tmp/tp-link
$ git clone https://github.com/gleb-chipiga/rtl8188eu
$ cd rtl8188eu
$ make
$ CURRENT_KERNEL=$( uname -r )
$ sudo cp 8188eu.ko /lib/modules/$CURRENT_KERNEL/kernel/drivers/net/wireless/
$ sudo depmod -a
$ sudo modprobe 8188eu
$ ip link show
The wireless adapter should be detected, no need to reboot.

References

Share on Facebook Twitter

Mapping Device to Persistent Name Using udev

Tags: April 12, 2014 11:38 PM
0 comments

To prevent device name changes from time to time i.e: /dev/sdc to /dev/sdd and so on a corresponding udev rules need to be created. The first step to dive into udev configuration is getting information from the device.

Getting Device Information

In this example I have Seagate 250GB hard drive which connected through USB. The device is currently attached to /dev/sdd. Here's how to get information from the device. All commands are run by root.

Share on Facebook Twitter

Compile SpiderMonkey Ubuntu Linux

Tags: January 4, 2013 11:23 PM
0 comments

Install terlebih dahulu paket-paket dependency yang diperlukan sebelum melakukan kompilasi.

# apt-get install nspr4-dev autoconf2.13
Download source SpiderMonkey 1.8.5 pada http://ftp.mozilla.org/pub/mozilla.org/js/js185-1.0.0.tar.gz.
# cd /tmp/
# wget http://ftp.mozilla.org/pub/mozilla.org/js/js185-1.0.0.tar.gz
# mkdir spidermonkey
# tar -zxvf js185-1.0.0.tar.gz -C /tmp/spidermonkey
# cd spidermonkey/js-1.8.5/js/src
# autoconf2.13
# ./configure
# make
Setelah selesai akan terdapat file binary pada shell/js, dimana file tersebut adalah Javascript Shell Interpreter yang menggunakan engine SpiderMonkey.
# shell/js
js> for (var i=0; i<3; i++) {         
print("notes.rioastamal.net");  
}
notes.rioastamal.net

js> quit()

Share on Facebook Twitter

Install Postfix on Ubuntu Server

Tags: April 29, 2012 12:02 PM
0 comments

Installing Postfix Mail Transport Agent (MTA) is very simple on ubuntu/debian.

# apt-get install postfix
Common configuration is internet site.

Listen Address

If the server only used by internal application for sending mail, then there is no need to bind to all interfaces. Just bind to loopback interface 127.0.0.1 as is more safe. The configuration located in /etc/postfix/main.cf.
# service postfix restart
# netstat -ntap | grep :25
tcp        0      0 127.0.0.1:25            0.0.0.0:*               LISTEN      8176/master

Share on Facebook Twitter

Memasang RapidSSL Certificate pada Nginx

Tags: April 28, 2012 5:37 PM
0 comments

Setelah menggenerate CSR, langkah berikutnya adalah menggabungkan server certificate dan intermediate certificate. Dua-duanya diperoleh setelah proser approval dari CSR. Berikut langkahnya.

Menggabungkan Certificate

Untuk lebih memudahkan, lokasi ssl certificate biasanya dikumpulkan pada direktori /etc/ssl

Share on Facebook Twitter

Konfigurasi Nginx sebagai Reverse Proxy Apache

Tags: 2:49 PM
0 comments

There is no home like Apache mod_php, itu mungkin yang dikatakan PHP. Performa PHP yang berjalan sebagai Fast-CGI process terkadang masih kalah dengan performa mod_php. Keunggulan utama Nginx adalah memory kecil dan sangat cepat dalam memproses static content. Untuk itu kenapa tidak memakai keunggulan dari keduanya sekaligus, mod_php sebagai PHP handler dan Nginx sebagai static content handler. It makes everyone happy :).

Share on Facebook Twitter

Instalasi Apache PHP MySQL pada Ubuntu Server

Tags: 12:13 PM
0 comments

PHP.net merekomendasikan penggunan apache-mpm-prefork karena ada beberapa extension PHP yang masih belum thread safe.

## dengan menginstall libapache2-mod-php5 maka otomatis paket-paket apache ikut terinstall
# apt-get install libapache2-mod-php5

## install PHP APC untuk opcode caching
# apt-get install php-apc

## install ekstensi untuk mysql
# apt-get install php5-mysql

## install mysql server
# apt-get install mysql-server

Share on Facebook Twitter

Instalasi git Pada Ubuntu Linux

Tags: 11:50 AM
0 comments

Proses instalasi berikut menggunakan official repository dari ubuntu bukan kompilasi dari source.

# apt-get install git-core
Setelah instalasi tambahkan user git (tanpa home) dan batasi shell aksesnya.
# useradd -s /usr/bin/git-shell -M git

Share on Facebook Twitter

Setting iptables pada Ubuntu

Tags: 6:05 AM
0 comments

Setting berikut secara default memblok semua paket yang masuk kecuali pada port 22, 80 dan 443.

# cek dulu apakah sudah ada settingan sebelumnya
# iptables -L

Chain INPUT (policy ACCEPT)
target     prot opt source               destination         

Chain FORWARD (policy ACCEPT)
target     prot opt source               destination         

Chain OUTPUT (policy ACCEPT)
target     prot opt source               destination

# settingan dapat dihapus dengan opsi flush

Share on Facebook Twitter

Install Nginx pada Ubuntu Server

Tags: March 11, 2012 4:36 PM
0 comments

Metode instalasi yang dipakai adalah menggunakan paket deb bukan dari source. Paket deb terbaru disediakan langsung oleh website official nginx. Versi ubuntu yang mendapat dukungan langsung adalah Ubuntu versi 10.04 Lucid Lynx (Per tanggal Maret 2012).

Import signature key dari nginx.org

$ cd /tmp
$ wget http://nginx.org/keys/nginx_signing.key
$ sudo apt-key add nginx_signing.key && rm nginx_signing.key

Tambahkan pada source.list.d

$ sudo vi /etc/apt/sources.list.d/nginx.list

## tambahkan satu baris berikut lalu simpan
deb http://nginx.org/packages/ubuntu/ lucid nginx

$ sudo apt-get update

Share on Facebook Twitter

Internet Connection Sharing pada Ubuntu via Wi-Fi

Tags: 9:40 AM
0 comments

Perangkat Keterangan Interface Alamat IP
Laptop Ubuntu 10.04 sebagai Host/Gateway ppp0 (Internet) DHCP dari ISP
eth0 (LAN) 192.168.1.10
TP-Link TL-WA5110G Access Point LAN Port 192.168.1.254
Android Phone Test Device - DHCP dari Access Point

Langkah-langkah pada Ubuntu

Diasumsikan bahwa kondisi Ubuntu sudah terkoneksi dengan internet jadi tidak perlu dijabarkan disini, yang akan disetting pada sisi ubuntu adalah IP address untuk interface eth0 dan paket forwarding. Hasil perintah dibawah ini bersifat temporer, artinya akan hilang ketika restart.

Share on Facebook Twitter