Showing posts with label linux. Show all posts

How to Kill Background Child Process in Bash

Tags: July 13, 2020 12:52 PM
0 comments

Terminate Background Child Process in Bash

In Bash by child process that sent into background is still alive when main program is terminated. Take a look an example below.

#!/bin/bash

# Run a Python web server
python -m http.server src/ &

# Run SASS watcher and compiler...
sass --watch src/scss:src/css &

wait
When we run script above and terminate using CTRL+C Python and SASS are still running.

Solution to terminate Background Child Process in Bash

The solution to above problem is using shell built-in trap command.

#!/bin/bash

# Kill all child process (Python and SASS) when exit
trap "kill 0" EXIT

# Run a Python web server
python -m http.server src/ &

# Run SASS watcher and compiler...
sass --watch src/scss:src/css &

wait

Now when the script is exited all the child process even which has been sent as background process will also terminated.

References

Share on Facebook Twitter

How to Escape Character when Running SSH Remote Command

Tags: April 8, 2020 4:18 AM
0 comments

Solution of Escaping Character on SSH

The solution is DO NOT escape it. Use cat HEREDOC to build the string of commands and then pass it to SSH.

$ export VARIABLE="FOO BAR"
$ cat <<EOF | ssh user@myserver bash
echo "This is complex command"
echo "Another command that take a $VARIABLE."
sudo mkdir /tmp/foo && echo "SUCCESS"
EOF

If you have a lot of $ dollar signs in your script and do not want local shell to interpret it then use single quote HEREDOC.

$ export VARIABLE_NAME="FOO BAR"
$ cat <<'EOF' | ssh user@myserver bash
export VARIABLE="SSH VAR"
echo "This is complex command"
echo "Another command that take a $VARIABLE name."
sudo mkdir /tmp/foo && echo "SUCCESS"
EOF

On command above the variable $VARIABLE value is "SSH VAR" since it is took the value from remote server not from local machine.

Share on Facebook Twitter

Curl Dump Response Headers to STDOUT and Ignore Response Body

Tags: May 7, 2018 6:48 AM
0 comments

Goals

Return only HTTP response header when opening a web page using curl. This is useful when we are interested in processing response headers only.

Command

We will utilize /dev/stdout and /dev/null to achieve what we want.

$ curl https://notes.rioastamal.net -D /dev/stdout -o /dev/null --silent
HTTP/2 200
date: Sun, 06 May 2018 23:42:37 GMT
content-type: text/html; charset=UTF-8
set-cookie: __cfduid=d6347d57f364b276150034b241b19cdb01525650157; expires=Mon, 06-May-19 23:42:37 GMT; path=/; domain=.rioastamal.net; HttpOnly
expires: Sun, 06 May 2018 23:42:37 GMT
cache-control: private, max-age=0
last-modified: Sun, 06 May 2018 23:42:05 GMT
x-content-type-options: nosniff
x-xss-protection: 1; mode=block
expect-ct: max-age=604800, report-uri="https://report-uri.cloudflare.com/cdn-cgi/beacon/expect-ct"
server: cloudflare
cf-ray: 416f4deb6f51a320-HKG

Reference

Share on Facebook Twitter

How to Remove Multiple Redis Cache

Tags: January 25, 2017 9:07 PM
1 comments

Goals

Remove multiple Redis cache key using one liner command.

Steps

Assume keys that we want to delete are keys beginning with 'laravel:' prefix.

$ redis-cli KEYS 'laravel:*'
1) "laravel:featured:2bf46b40ed15"
2) "laravel:list:5509f57fdaef"
3) "laravel:list:2bf46b40ed15"
4) "laravel:list:e1bf5bfc2ab8"
5) "laravel:list-total-rec:adc81409d693"
6) "laravel:list-total-rec:e1bf5bfc2ab8"
7) "laravel:promotion-list:adc81409d693"
8) "laravel:list:d1f68333e3bb"
9) "laravel:list:c6a45c5cf5c5"

Just pipe the output above to xargs command. By default redis-cli will use raw format when STDOUT is not tty, which in case is true for xargs.

$ redis-cli KEYS 'laravel:*' | xargs redis-cli DEL
(integer) 9

Reference

Share on Facebook Twitter

How to Extract Specific Directory from Tarball

Tags: September 24, 2016 9:30 PM
0 comments

Problem

We have huge file of gzipped tarball and we want to extract only specific directory from the tarball.

Solution

Make sure the pattern we want to extract by searching it first. As an example we want to extract directory named johndoe-website, but we did not know the full pattern of the directory.

$ tar tvf the-archive.tar.gz | grep johndoe-website
home/sites/clients/johndoe-website/javascripts/main.js
home/sites/clients/johndoe-website/styles/main.css
home/sites/clients/johndoe-website/index.html
From the output above we knew that the pattern of the directory is home/sites/clients/johndoe-website. Command below will extract johndoe-website from the archive and strip the 3 leading directories.
$ tar xvf the-archive.tar.gz --strip-components=3 -C /destination/path home/sites/clients/johndoe-website
Command above works in GNU Tar and BSD Tar (Mac OS X).

Share on Facebook Twitter

Quickest Way: Using STDIN and Pipe to Copy SSH Public Key to Server

Tags: July 27, 2016 8:13 PM
0 comments

Goal

Copy SSH public key to another machine without using external tools such as ssh-copy-id - Only pure shell built-in or at least standard commands.

Solution

The solution is using shell STDIN and PIPE it to ssh.

$ cat ~/.ssh/id_rsa.pub | ssh user@hostname 'cat >> .ssh/authorized_keys -'
The quote for the ssh arguments is important because without it the redirection will goes to your local machine instead of remote machine. The "-" at the last of cat command on the remote indicate it reads the input from STDIN.

Reference

Share on Facebook Twitter

How to Create Root Certificate Authority (CA) and Self Signed Certificate

Tags: June 18, 2016 9:47 AM
0 comments

Goal

Make client application such as web browser to trust our self signed certificate, so we can use any custom domain in development or internal network.

Generate Root CA

The first is to generate private key for our Certificate Authority (CA). Command below will generate RSA based private key 2048 bits key size.

$ mkdir self-root-ca && cd self-root-ca
$ openssl genrsa -out myRootCA.key
Generating RSA private key, 2048 bit long modulus
.................+++
................+++
e is 65537 (0x10001)
$ chmod 0600 myRootCA.key

Command above will produce a file called myRootCA.key. The chmod command will make sure that only super user and the creator of the key able to read the file.

Share on Facebook Twitter

Custom Solution for Managing ssh-agent without Gnome Keyring

Tags: June 14, 2016 8:08 PM
0 comments

Goal

How to enter ssh private key password only once without having managed by Gnome Keyring. The ssh agent should remain detected every time new terminal spawned or even on tty console CTRL+ALT+F1 and so on.

Solutions

We will utilize ssh-add, ssh-agent and little bit shell script commands for achieving the goal.

Step 1

First start the authentication agent and redirect the result to a file so can gather the agent information later.
$ ssh-agent -s > /tmp/my-ssh-agent.sh
Execute the file so we have the correct environment variables needed by ssh-add.

Share on Facebook Twitter

Starting Ngrok Automatically at Boot Using Upstart

Tags: May 19, 2016 6:41 PM
0 comments

Goal

Expose SSH of the local machine to the internet using service provided by ngrok.com.

Steps

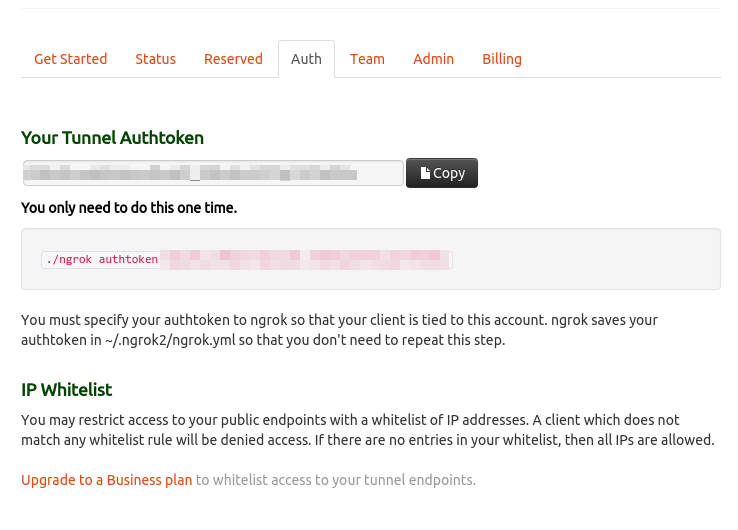
First thing first create an account at ngrok.com so we can get the Auth Token and also can monitor the tunnel created and know the address of the tunnel. Next is create a configurion file under ~/.ngrok2/ngrok.yml to store the token. You can get this token on your Ngrok dashboard.

$ cat > ~/.ngrok2/ngrok.yml
authtoken: YOUR_NGROK_TOKEN
Then create new file called ngrok.conf in /etc/init. Assuming the location of the ngrok binary is on /opt/ngrok/ngrok.

Share on Facebook Twitter

Simplify Multi-Hop SSH Connection Using Config

Tags: April 29, 2016 8:15 PM
0 comments

Goal

Using SSH config to simplify connecting to another host from a host a.k.a multi-hop connection. Diagram for the connection:
+---------------+
| Local Machine |
| 192.168.0.5   |
+---------------+
      |
      | SSH 
       \
       \/
+-------------------------------------+
| Host Machine 192.168.0.10           |
|           /          \              |
|          / -- SSH --  \             |
|  +--------------+  +-------------+  |
|  | Docker 1     |  | Docker 2    |  |
|  | 172.17.0.1   |  | 172.17.0.2  |  |
|  +--------------+  +-------------+  |
|                                     |
+-------------------------------------+

Share on Facebook Twitter

Configure Postfix to Relay to Amazon SES SMTP Server

Tags: April 27, 2016 6:55 AM
0 comments

Goal

Configure internal Postfix installation to relay email to Amazon SES SMTP server.

Steps

Make sure you have done everything that Amazon SES requires you before you're able to send email using Amazon SES. After that you can start to proceed steps below.

1. Install Postfix

$ sudo apt-get install postfix libsasl2-modules

2. Configure SMTP Credential

Make sure you already have Amazon SES username and secret key. Now we need to add the credential into postfix lookup table.
$ sudo cat > /etc/postfix/sasl_passwd
[email-smtp.us-east-1.amazonaws.com]:587 YOUR_USERNAME:YOUR_SECRET_KEY
$ sudo chmod 0600 /etc/postfix/sasl_passwd
You may change the smtp server email-smtp.us-east-1.amazonaws.com according region where you setup the Amazon SES. Now update the postfix lookup table.
$ sudo postmap /etc/postfix/sasl_passwd

Share on Facebook Twitter

How to Fix Multi-Hop SSH Forward Agent Issue

Tags: April 25, 2016 11:41 AM
0 comments

Problem

You want to connect to the 3rd SSH machine but using the key from the 1st hop not from your local machine. Here is the diagram:
+-----------------------+
|  Local Machine (LM)   |
+-----------------------+
            |
            |
+-------------------------+
|  Remote Machine 1 (RM1) | -> 1st Hop
+--------------------------+
            |
            |
+-------------------------+
|  Remote Machine 2 (RM2) | -> 2nd Hop  
+-------------------------+
            |
            |
+-------------------------+
|  Remote Machine 3 (RM3) | -> 3rd Hop
+-------------------------+
Commands listed below shown what issue we had with the forward agent.
user@local-machine~$ ssh -A remote-machine-1

user@remote-machine-1~$ ssh -A remote-machine-2
(Permission denied)
The authentication was fail because RM2 expect key from RM1 but which ssh agent sent was key from Local Machine.

Share on Facebook Twitter

Reset All Tables Except Migration Table on MySQL

Tags: April 15, 2016 9:29 PM
0 comments

Overview

When developing an application there is case when you need to clear all the data in your database e.g: testing the seeding or such. But you want to exclude some tables let say migration table which used by the application framework to migrate the schema.

Problem

You want to clean up data on all the tables, except the migration table because you don't want to re-run the schema migration.

Solution

  1. Get list of tables
  2. Exclude the migration table
  3. Append the prefix 'DELETE FROM ' to each line
  4. Append the suffix ';' to each line
  5. Pipe the result to MySQL
$ echo "SHOW TABLES;" | mysql -N DB_NAME | grep -v orb_migration | sed -e 's/^/DELETE FROM /' -e 's/$/;/' | mysql DB_NAME
In case above the table which excluded is orb_migration.

Share on Facebook Twitter

How to Detect Disconnected Client from Our Network

Tags: February 19, 2015 9:01 PM
0 comments

Overview

If you have a Linux box which act as gateway or Captive Portal, you might want to do something fancy when client get connected or disconnected from your box. As an example, you want to modify some iptables rules as soon as client leave your network.

Problem

You want to detect status of a machine as soon as it disconnected form your network. The arp command utility still displaying client which already gone from our network. The default cache time inside Linux kernel might be set for longer period of time.

Solution

Instead of using arp utility, we can use ip command utility as tool for displaying statistics of our "neighbors". Below is an example of showing status of our neighbors.

Share on Facebook Twitter

Switching USB Modem to Serial Manually

Tags: May 12, 2014 3:56 AM
0 comments

Without having to use usb-modeswitch switching the USB modem can be done easily. In this example I use USB CDMA modem with vendor ID 201e and product ID 1023 (when detected as CD-ROM storage) and product ID 1022 (when detected as USB modem or USB storage).

Requirements

Most of these module are present in all modern linux distro.
  • Kernel module: option (USB Driver for GSM modems)
  • Kernel module: usbserial (USB Serial Driver core)

Step 1: Detach the CD-ROM Storage

When you first plug your USB modem it might detected as CD-ROM storage. To identify the modem you can use dmesg and lsusb commands. Make sure running these commands as root.

Share on Facebook Twitter

Ubuntu TP-Link TL-WN723N Ad-Hoc Network

Tags: May 11, 2014 3:20 PM
0 comments

The Wifi ad-hoc network configuration that will be created for this task are composed from the following devices:

  1. Computer A (TP-Link TL-WN723N) IP: 192.168.1.25/29
  2. Computer B (Other Wireless) IP: 192.168.1.26/29

Step by Step Ad-Hoc Configuration

This is important, the Computer B should be configured first followed by Computer A. It might not work if configured using opposite order. Bug: https://github.com/lwfinger/rtl8188eu/issues/4

Share on Facebook Twitter

Ubuntu Linux TP-Link TL-WN723N Driver

Tags: May 9, 2014 11:18 PM
0 comments

Update

The more recent driver for TP-Link TL-WN723N can be found on https://github.com/lwfinger/rtl8188eu. This new driver address problem for kernel 3.8+. Do not forget to copy the firmware file rtl8188eufw.bin to /lib/firmware/rtlwifi/. Failed to do so, you might can not bring the device up.


I just bought a nano wireless adapter from TP-Link, the TL-WN723N. But my Xubuntu 12.04 did not recognize it, well that sucks. But thanks to this guy he made the driver for it: https://github.com/gleb-chipiga/rtl8188eu.

Driver Installation

Make sure the compiler and git already installed on the system.
$ mkdir -p /tmp/tp-link && cd /tmp/tp-link
$ git clone https://github.com/gleb-chipiga/rtl8188eu
$ cd rtl8188eu
$ make
$ CURRENT_KERNEL=$( uname -r )
$ sudo cp 8188eu.ko /lib/modules/$CURRENT_KERNEL/kernel/drivers/net/wireless/
$ sudo depmod -a
$ sudo modprobe 8188eu
$ ip link show
The wireless adapter should be detected, no need to reboot.

References

Share on Facebook Twitter

Finding Interface Name Using IP Address

Tags: April 23, 2014 7:47 AM
0 comments

Getting network interface name using IP address could be accomplished by issuing:

$ ip addr show | grep "192.168.1.2" | awk '{print $7}'
or another alternative:
ifconfig | grep -B 1 "192.168.1.2" | head -n1 | awk '{print $1}'
Both command would output the name of interface such as eth0, eth1, etc.

Reference

Share on Facebook Twitter

Fix LVM Input/Output Error Caused by Node Change

Tags: April 13, 2014 8:42 AM
0 comments

I have LVM partition reside on my external hard drive which connected trough USB. Here's the output before I unplug the device.

$ pvs
  PV               VG    Fmt  Attr PSize   PFree  
  /dev/maxtor1-40g       lvm2 a-    37.27g  37.27g
  /dev/sde5        XENVG lvm2 a-   125.78g 121.78g
When I unplug and plug the device I always got I/O error like this:
$ pvs
  /dev/dm-0: read failed after 0 of 4096 at 0: Input/output error
  /dev/dm-0: read failed after 0 of 4096 at 4294901760: Input/output error
  /dev/dm-0: read failed after 0 of 4096 at 4294959104: Input/output error
  /dev/dm-0: read failed after 0 of 4096 at 4096: Input/output error
  PV               VG    Fmt  Attr PSize   PFree  
  /dev/maxtor1-40g       lvm2 a-    37.27g  37.27g
  /dev/sdd5        XENVG lvm2 a-   125.78g 121.78g
Well that sucks since it would become unmountable. The LVM still pointing to the old /dev/sde5 that's why the error comes.

Share on Facebook Twitter

Mapping Device to Persistent Name Using udev

Tags: April 12, 2014 11:38 PM
0 comments

To prevent device name changes from time to time i.e: /dev/sdc to /dev/sdd and so on a corresponding udev rules need to be created. The first step to dive into udev configuration is getting information from the device.

Getting Device Information

In this example I have Seagate 250GB hard drive which connected through USB. The device is currently attached to /dev/sdd. Here's how to get information from the device. All commands are run by root.

Share on Facebook Twitter